Make meals easier with these quick and easy recipes for lunch meat! Sometimes, cooking can feel like a chore—especially when you’re pressed for time. We’ve all been there: the clock is ticking, hunger is setting in, and you’re rummaging through your fridge, trying to whip up something tasty and satisfying.

Enter the world of lunch meat: a real game changer for creating quick, flavorful meals that will delight both the adults and the kids at your table. Our goal is to spark your culinary creativity by showcasing the versatile nature of lunch meats in an array of delicious, simple recipes.
With various types of lunch meats—from the lean and savory turkey breast, to the rich and flavorful salami—you’re sure to find a selection that suits every palate in your household. And the best part? These recipes don’t require professional chef skills or hours in the kitchen! So, let’s put that package of lunch meat to use.
Different Types of Lunch Meat
Lunch meats, also known as cold cuts, are pre-cooked or cured meats that are sliced and served cold or hot on sandwiches or in various other recipes. They’re a go-to ingredient for many households due to their convenience, variety, and long shelf life. These are the most popular types of lunch meats:
- Turkey Breast: A lean, white meat that’s delicately flavored, turkey breast is a popular choice for those watching their calories. It pairs well with a wide range of flavors—from tangy cranberry and crisp apple, to hearty mustard and smooth cheese.
- Chicken Breast: Slightly more flavorful than turkey, chicken breast is another lean white meat that’s incredibly versatile. Whether you combine it with fresh salad greens, spicy sauces, or sweet chutneys, chicken breast is a surefire winner.
- Deli Ham: Usually cured, deli ham comes in various types, such as smoked, honey-roasted, or black forest. Its sweet and savory taste is loved by many, making it a great addition to sandwiches, wraps, and salads.
- Deli Roast Beef: Juicy and robust, deli roast beef brings a hearty, meaty flavor to any meal. It pairs wonderfully with sharp cheddar, horseradish, or traditional gravy.
- Bologna: A type of sausage made from pork, beef, or chicken, bologna is mildly flavored and slightly spiced. Bologna is delicious fried, paired with a slice of American cheese, or simply layered in a sandwich with your favorite condiments.
- Salami: A type of cured sausage, salami has a strong, distinctive flavor that’s usually a bit spicy or garlicky. It’s a perfect match for robust cheeses and tangy pickles.
While these meats are convenient and tasty, it’s always important to consider nutrition. Many lunch meats can be high in sodium and nitrates, so opt for low-sodium and nitrate-free varieties whenever possible. Balance your meal with plenty of fresh veggies, whole grains, and a piece of fruit for a well-rounded, nutritious meal.
Turkey Breast
Turkey breast is a lunch meat favorite. It’s mild, slightly sweet flavor pairs well with a variety of ingredients, providing a canvas for creativity. So, let’s transform this simple lunch meat into some scrumptious dishes!
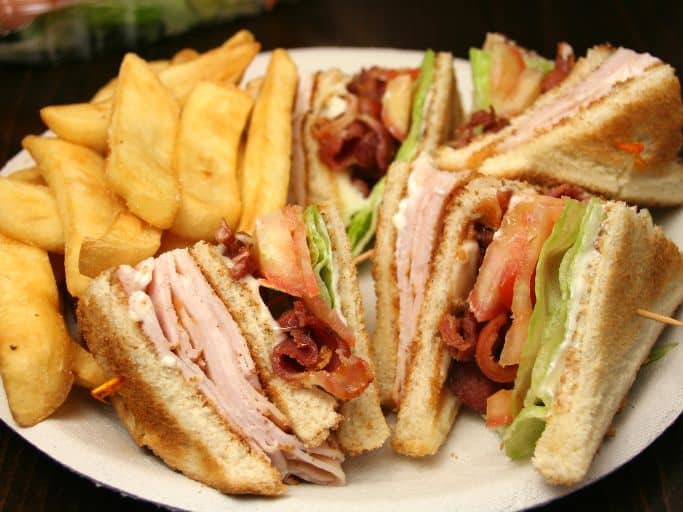
Turkey Club Sandwich
A classic sandwich recipe that’s quick to assemble and absolutely delicious to enjoy!
Ingredients:
- 2 slices of whole grain bread
- 4-6 slices of turkey breast
- 2-3 slices of crispy cooked bacon
- Lettuce
- Tomato slices
- 1 tablespoon of mayonnaise
Instructions:
- Spread the mayonnaise evenly over one side of each slice of bread.
- On the first slice of bread, layer your turkey breast.
- Add your crispy bacon on top of the turkey.
- Layer your lettuce and tomato slices on top of the bacon.
- Cap it all off with the second slice of bread, mayo-side down.
- Cut the sandwich in half if desired and serve immediately.
Turkey Wrap with Greens and Avocado
This wrap is a healthy and filling option, perfect for a quick lunch or dinner.
Ingredients:
- 1 large whole grain wrap
- 4-6 slices of turkey breast
- A handful of mixed salad greens
- Half an avocado, sliced
- 1 tablespoon of Greek yogurt or light mayo
Instructions:
- Spread Greek yogurt or light mayo over the surface of the wrap.
- Layer turkey breast in the center of the wrap.
- Add the mixed salad greens on top of the turkey.
- Place avocado slices over the greens.
- Carefully roll up the wrap, tucking in the sides as you go.
- Cut the wrap in half and serve.
Turkey and Cream Cheese Pinwheels
These pinwheels are perfect as a quick lunch, snack, or party appetizer. They’re easy to prepare and fun to eat!
Ingredients:
- 1 large whole grain tortilla or flatbread
- 4-6 slices of turkey breast
- 2 tablespoons of cream cheese
- A handful of fresh spinach leaves
- 1/4 cup of thinly sliced bell peppers (any color)
Instructions:
- Spread cream cheese evenly over the surface of the tortilla or flatbread.
- Layer turkey slices on top of the cream cheese.
- Arrange fresh spinach leaves over the turkey.
- Add thinly sliced bell peppers on top of the spinach.
- Starting from one end, roll up the tortilla tightly.
- Slice the roll into 1-inch thick pinwheels.
- Serve immediately or refrigerate until ready to serve.
Turkey Cranberry Cracker Bites
These cracker bites are a delightful and easy-to-make appetizer, perfect for family gatherings and holiday celebrations. They combine the tangy taste of cranberries with the savory flavors of turkey and cheese, all layered on a whole-wheat cracker.
Ingredients:
- 10 whole-wheat crackers
- 1/3 cup of cranberry jelly
- 10 slices of deli turkey (or ½ cup of thinly sliced turkey meat), cut into quarters
- 5 slices of provolone cheese, cut into quarters
- 2 tablespoons + 2 teaspoons of cranberry sauce, excess sauce drained
- 10 pecans, crushed
Instructions:
- Start by spreading a teaspoon of cranberry jelly on each cracker.
- Layer a quarter slice of turkey meat on top of the jelly.
- Add two quarter slices of provolone cheese on top of the turkey.
- Spoon a small amount of cranberry sauce (about half a teaspoon) over the center of the cheese.
- Finish off by sprinkling crushed pecans over the cranberry sauce.
- Repeat these steps for each cracker. Your cranberry cracker bites are now ready to be served!
Chicken Breast
Chicken breast lunch meat offers a slightly richer flavor than turkey, making it an excellent choice for a variety of dishes. Let’s look at some quick, tasty recipes.
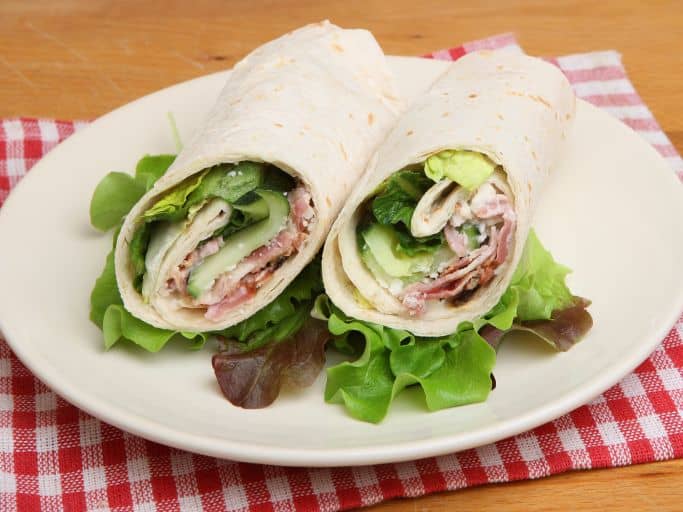
Chicken Caesar Salad Wrap
Here’s a light, healthy, and delicious lunch that comes together in a snap.
Ingredients:
- 1 large whole grain wrap
- 4-6 slices of chicken breast lunch meat
- 2 cups of romaine lettuce, chopped
- 2 tablespoons of Caesar dressing
- Parmesan cheese shavings
Instructions:
- Spread Caesar dressing over the surface of the wrap.
- Layer chicken breast in the center of the wrap.
- Add chopped romaine lettuce on top of the chicken.
- Sprinkle with Parmesan cheese shavings.
- Roll up the wrap carefully, tucking in the sides as you go.
- Cut the wrap in half and serve.
Chicken and Apple Salad
A sweet and savory salad that’s refreshing and satisfying.
Ingredients:
- 4-6 slices of chicken breast, diced
- 2 medium apples, diced
- 2 celery stalks, diced
- 1/4 cup of walnuts, chopped
- 1/4 cup of Greek yogurt
- Salt and pepper to taste
Instructions:
- In a bowl, combine diced chicken, apples, celery, and walnuts.
- Add Greek yogurt to the mixture, stirring until everything is well-coated.
- Season with salt and pepper to taste.
- Serve immediately, or refrigerate for an hour to let the flavors meld together.
Grilled Chicken Panini with Pesto
This warm, toasty sandwich is sure to delight your taste buds with its rich flavors and satisfying textures.
Ingredients:
- 2 slices of ciabatta or your preferred bread
- 4-6 slices of chicken breast lunch meat
- 1 tablespoon of pesto sauce
- A few slices of fresh mozzarella cheese
- A handful of fresh baby spinach leaves
- Butter or cooking spray for grilling
Instructions:
- Spread pesto sauce on one side of each bread slice.
- On one slice of bread, layer chicken breast slices, mozzarella cheese, and baby spinach.
- Top with the second slice of bread, pesto side down.
- Preheat a panini press or a non-stick skillet over medium heat.
- Lightly butter the outside of your sandwich or spray the panini press or skillet with cooking spray.
- Cook the sandwich until the bread is golden brown and the cheese has melted, about 3-5 minutes per side if using a skillet.
- Let the sandwich cool for a minute, then cut it in half and serve.
Deli Ham
Next up in our list of versatile lunch meats is deli ham. From smoky to sweet, deli ham comes in an array of flavors, making it an exciting addition to a wide variety of dishes. If you’re a fan of this lunch meat staple, get ready to be inspired by the following quick and easy recipes!

Ham and Cheese Sliders
A crowd-pleaser in every sense, these sliders are perfect for a quick family lunch, a picnic, or even a party!
Ingredients:
- 12 mini slider buns
- 12 slices of deli ham
- 12 slices of your favorite cheese (Swiss or cheddar works great)
- 2 tablespoons of melted butter
- 1 tablespoon of mustard
- 1 tablespoon of honey
Instructions:
- Preheat your oven to 350°F (175°C).
- Cut the slider buns in half and layer the bottom halves in a baking dish.
- Layer a slice of ham and a slice of cheese on each bun.
- Place the top halves of the buns on the sliders.
- Mix the melted butter, mustard, and honey together in a small bowl. Brush this mixture over the tops of the sliders.
- Bake for 15-20 minutes, until the cheese is melted and the tops of the buns are golden.
- Serve warm and enjoy!
Ham, Egg, and Cheese Breakfast Burrito
Who said lunch meat was just for lunch? This delicious burrito will kickstart your day!
Ingredients:
- 1 large tortilla
- 2-3 slices of deli ham
- 2 eggs, scrambled
- 1 slice of cheddar cheese
- 2 tablespoons of salsa
- Salt and pepper to taste
Instructions:
- Lay the tortilla flat and place ham slices in the middle.
- Layer the scrambled eggs on top of the ham.
- Place a slice of cheddar cheese on top of the eggs.
- Add salsa, then sprinkle with salt and pepper to taste.
- Roll the tortilla into a burrito, folding in the sides as you go.
- For an optional toasty finish, heat a skillet over medium heat and lightly toast the burrito on all sides until golden brown.
- Cut in half and serve. This is a breakfast that will fuel your day!
Hawaiian Pizza with Ham and Pineapple
The combination of ham and pineapple brings a delightful balance of salty and sweet to this easy, homemade pizza.
Ingredients:
- 1 pre-made pizza crust
- 1/2 cup of pizza sauce
- 1 cup of shredded mozzarella cheese
- 6-8 slices of deli ham, cut into strips
- 1/2 cup of pineapple chunks
- Optional: a sprinkle of dried oregano or Italian seasoning
Instructions:
- Preheat your oven to the temperature suggested on the pizza crust packaging.
- Spread pizza sauce evenly over the pre-made pizza crust.
- Sprinkle half the mozzarella cheese over the sauce.
- Arrange the strips of ham and pineapple chunks evenly over the cheese.
- Top with the remaining mozzarella cheese.
- If desired, sprinkle a little dried oregano or Italian seasoning on top.
- Bake according to the crust package instructions, usually around 12-15 minutes, until the cheese is bubbly and slightly golden.
- Let the pizza cool for a few minutes, then slice and serve.
Mexican Macaroni Ham Salad
This pasta salad is a flavorful and easy-to-make dish that can be served as a light main course or a side dish. It’s a versatile recipe that brings together common kitchen ingredients in a delicious combination.
Ingredients:
- 2 cups or 8 oz dried small macaroni noodles
- ¼ cup + 1 Tablespoons mayonnaise
- ¼ cup + 1 Tablespoon Mexican sour cream or substitute with crème Fraiche
- Large pinch of salt
- Large pinch of ground black pepper
- 6 oz of sliced ham, or more if desired
- 1 15 oz can of mixed vegetable mix, drained
- Optional: pickled jalapenos, drained and roughly chopped (according to spiciness level)
Instructions:
- Cook the macaroni noodles as per the instructions on the package. Once cooked, drain and let it cool. You can also rinse it under cool water to speed up the cooling process.
- In a large bowl, mix together the mayonnaise, Mexican sour cream, salt, and pepper until they are well combined.
- Add the cooled macaroni to the bowl and stir until the pasta is well coated with the dressing.
- Next, add the drained mixed vegetables to the bowl and mix until they are evenly distributed.
- If you’re using pickled jalapenos, add them to the bowl and mix.
- Finally, add the sliced ham to the bowl and stir until all the ingredients are well incorporated.
- You can serve the salad immediately, or for best results, refrigerate it for at least 30 minutes to allow the flavors to meld together.
Deli Roast Beef
Moving on, let’s take a look at deli roast beef. Known for its rich and savory flavor, this lunch meat can make a simple sandwich feel like a gourmet meal. If you’ve been wondering how to elevate your use of deli roast beef, these recipes are sure to inspire you!
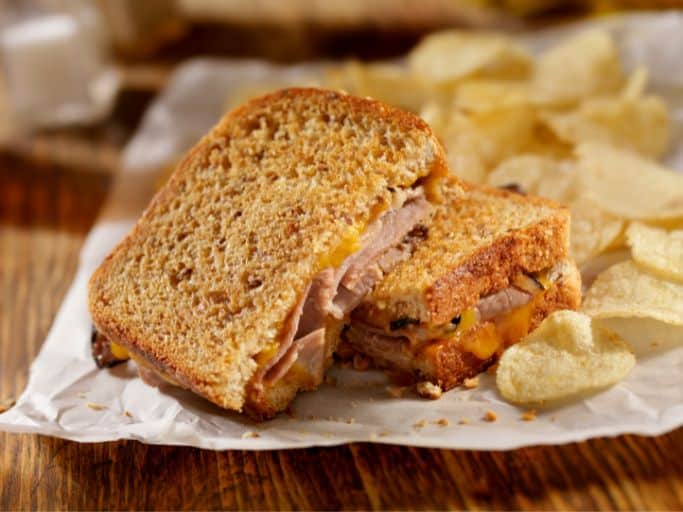
Roast Beef and Cheddar Sandwich
A classic combination that never disappoints, this sandwich is both simple to prepare and satisfying to eat!
Ingredients:
- 2 slices of whole grain bread
- 4-6 slices of deli roast beef
- 1 slice of sharp cheddar cheese
- 2 leaves of romaine lettuce
- 1-2 slices of ripe tomato
- 1 tablespoon of mayonnaise or horseradish sauce
Instructions:
- Spread the mayonnaise or horseradish sauce evenly over one side of each slice of bread.
- On the first slice of bread, layer your roast beef.
- Place the cheddar cheese on top of the roast beef.
- Layer your romaine lettuce and tomato slices on top of the cheese.
- Top with the second slice of bread, sauce-side down.
- Cut the sandwich in half and serve immediately.
Roast Beef and Veggie Wrap
This recipe is a fantastic way to incorporate more vegetables into your meal while enjoying the robust flavor of roast beef.
Ingredients:
- 1 large whole grain wrap
- 4-6 slices of deli roast beef
- A handful of mixed salad greens
- 1/4 cup of shredded carrots
- 1/4 cup of thinly sliced cucumber
- 2 tablespoons of your favorite dressing (ranch or vinaigrette works well)
Instructions:
- Spread dressing evenly over the surface of the wrap.
- Layer roast beef in the center of the wrap.
- Add mixed salad greens, shredded carrots, and cucumber slices on top of the beef.
- Carefully roll up the wrap, tucking in the sides as you go.
- Cut the wrap in half and serve.
Roast Beef and Swiss Cheese Panini
This warm, melty panini is an elevated take on the classic roast beef sandwich.
Ingredients:
- 2 slices of sourdough bread
- 4-6 slices of deli roast beef
- 1 slice of Swiss cheese
- 1 tablespoon of Dijon mustard
- A handful of arugula
- Butter or cooking spray for grilling
Instructions:
- Spread Dijon mustard on one side of each bread slice.
- On one slice of bread, layer roast beef, Swiss cheese, and arugula.
- Top with the second slice of bread, mustard-side down.
- Preheat a panini press or a non-stick skillet over medium heat.
- Lightly butter the outside of your sandwich or spray the panini press or skillet with cooking spray.
- Cook the sandwich until the bread is golden brown and the cheese has melted, about 3-5 minutes per side if using a skillet.
- Let the sandwich cool for a minute, then cut in half and serve.
Philly Cheesesteak Omelet
Here is a delightful breakfast dish that brings the flavors of the classic Philly cheesesteak sandwich into a low-carb, gluten-free, and potentially Paleo-friendly omelet. It’s a hearty and filling way to start your day.
Ingredients:
- 3 eggs, beaten
- 3-4 slices roast beef, torn into pieces
- 2-3 slices provolone cheese
- 1/4 green pepper, sliced
- 1/4 medium onion, sliced
- 1 tbsp. butter
Instructions:
- Start by sautéing the sliced onions and green peppers in butter until they become tender.
- Add the torn roast beef to the pan with the vegetables and cook until the edges of the meat start to brown slightly.
- In a separate skillet sprayed with cooking oil, pour in the beaten eggs. Cook the eggs until the bottom becomes firm.
- Flip the omelet and remove the skillet from the heat. Add the cooked vegetables and meat to one half of the omelet.
- Cover the skillet with a lid and let it sit for a minute to allow the cheese to melt and the bottom of the egg to cook a bit more.
- Slide the omelet onto a plate and fold it over.
Bologna
Bologna, a lunchtime classic, is next on our menu. Its affordability makes it a favorite among many families.

Classic Bologna Sandwich
Let’s start with a classic! This bologna sandwich recipe is straightforward, but it’s all about how you put it together.
Ingredients:
- 4 slices of white bread
- 2-4 slices of bologna
- 2 slices of American cheese
- 2-4 leaves of iceberg lettuce
- 4 slices of ripe tomato
- 2 tablespoons of mayonnaise
Instructions:
- Spread mayonnaise evenly on one side of each slice of bread.
- On the first slice, layer your bologna.
- Add the American cheese on top of the bologna.
- Layer your iceberg lettuce and tomato slices on top of the cheese.
- Top with the second slice of bread, mayo-side down.
- Cut the sandwich in half and serve immediately.
Bologna and Cream Cheese Roll-ups
These roll-ups are an easy, fun, and protein-packed snack or lunch option.
Ingredients:
- 4-6 slices of bologna
- 2-3 tablespoons of cream cheese
- 1/4 cup of finely diced bell peppers
Instructions:
- Spread cream cheese evenly over each slice of bologna.
- Sprinkle the diced bell peppers over the cream cheese.
- Carefully roll up each slice of bologna.
- Cut each roll into 1-inch sections, if desired, or leave whole.
- Serve as they are or stick a toothpick in each for easy snacking.
Fried Bologna and Egg Breakfast Sandwich
This recipe takes bologna to the breakfast table for a hearty start to your day.
Ingredients:
- 1 slice of bologna
- 1 egg
- 1 slice of cheddar cheese
- 2 slices of bread (white, whole grain, or even an English muffin)
- 1 tablespoon of butter
- Salt and pepper to taste
Instructions:
- Heat a non-stick skillet over medium heat.
- Add bologna slices and cook until they start to brown, about 2 minutes per side. Remove from the skillet and set aside.
- In the same skillet, add butter and allow it to melt. Crack the egg into the skillet, season with salt and pepper, and fry to your preference.
- While the egg is cooking, toast your bread.
- To assemble the sandwich, place a slice of cheddar cheese on one slice of bread. Top with fried bologna, the egg, and finally the second slice of bread.
- Cut in half and serve warm.
Salami
Last but certainly not least, let’s dive into salami, a flavorful and robust lunch meat that can bring a rich and savory element to a variety of dishes. Salami’s distinctive flavor profile, with notes of garlic and spices, sets it apart from other lunch meats and makes it a great addition to many different meals. Let’s explore some easy and delicious ways to incorporate salami into your recipes!

Italian Style Salami Sandwich
This sandwich, inspired by Italian deli flavors, is sure to be a hit at lunchtime.
Ingredients:
- 2 slices of crusty Italian bread or a ciabatta roll
- 4-6 slices of salami
- 1 slice of provolone cheese
- A handful of fresh baby spinach or arugula
- 1-2 slices of tomato
- 1 tablespoon of Italian dressing or olive oil and vinegar
Instructions:
- Drizzle the Italian dressing (or olive oil and vinegar) on one side of each slice of bread.
- Layer the salami on the first slice of bread.
- Place the provolone cheese on top of the salami.
- Add your choice of greens and tomato slices.
- Top with the second slice of bread, dressing side down.
- Serve immediately or press in a panini press for a toasty version.
Salami and Cream Cheese Pinwheels
These easy-to-make pinwheels are perfect as an appetizer or a quick snack.
Ingredients:
- 1 large tortilla
- 2-3 tablespoons of cream cheese
- 4-6 slices of salami
- A handful of finely shredded lettuce
Instructions:
- Spread cream cheese evenly over the entire surface of the tortilla.
- Arrange the salami slices on top of the cream cheese.
- Sprinkle the shredded lettuce over the salami.
- Roll up the tortilla tightly, then cut into 1-inch pinwheels.
- Serve immediately, or refrigerate for later use.
Salami and Mozzarella Pizza
This homemade pizza is easy to prepare and full of flavor, thanks to the savory salami and melty mozzarella.
Ingredients:
- 1 pre-made pizza crust
- 1/2 cup of pizza sauce
- 1 cup of shredded mozzarella cheese
- 4-6 slices of salami, cut into strips
- A handful of fresh basil leaves
Instructions:
- Preheat your oven to the temperature indicated on the pizza crust package.
- Spread the pizza sauce evenly over the crust.
- Sprinkle half the mozzarella cheese over the sauce.
- Arrange the salami strips evenly over the cheese.
- Top with the remaining mozzarella cheese.
- Bake according to the crust package instructions, generally around 12-15 minutes, until the cheese is bubbly and slightly golden.
- Remove the pizza from the oven, scatter fresh basil leaves on top, and let it cool for a few minutes before slicing and serving.
Frequently Asked Questions
Is lunch meat healthy?
Lunch meats can be part of a balanced diet when consumed in moderation. They’re a good source of protein, and some types like turkey and chicken breast are low in fat. However, it’s important to be mindful that lunch meats can be high in sodium and some are processed with preservatives. When possible, opt for lower sodium varieties or those labeled as “no preservatives” or “uncured.”
How long does lunch meat last in the fridge?
Once opened, lunch meat typically lasts about 3-5 days in the fridge. Unopened packages can last up to two weeks, but always check the “use by” date on the package. If the lunch meat develops a strange smell, a slimy texture, or discoloration, it’s safer to discard it.
What are some low-carb options?
For a low-carb alternative, try using lettuce wraps instead of bread or tortillas. You could also serve the meat and toppings as a salad. The pinwheel recipes could be made with low-carb tortillas as well.

